Nodes serve as the fundamental elements of a workflow, facilitating the execution of various operations by interlinking nodes with distinct functions.
Start Node
This node defines the starting point of your workflow, establishing the initial parameters needed to begin the process.
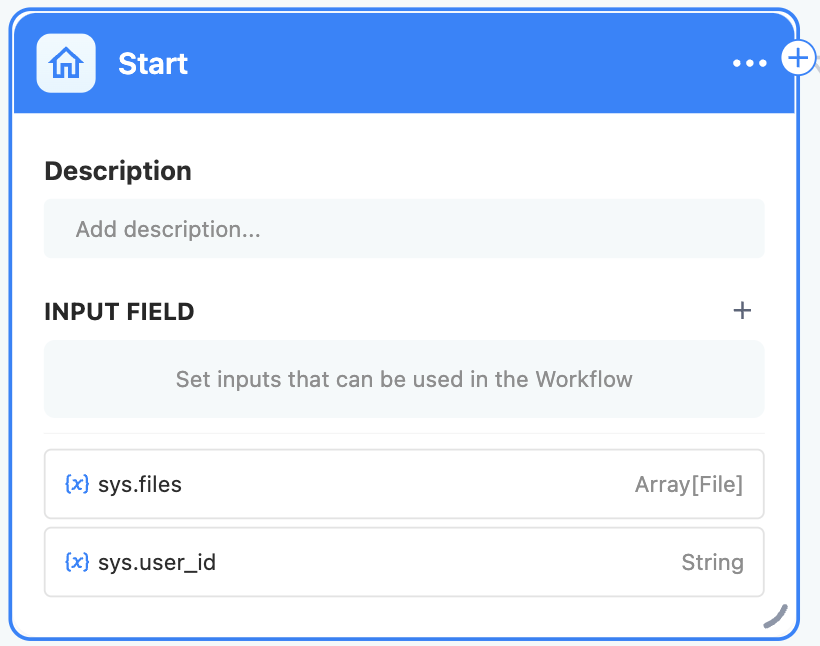
Customize the input variables within the start node to initiate the workflow. Every workflow mandates a start node as the precursor to execution.
Once set up, the workflow will request input values for these specified variables at the time of execution.
End Node
The end node determines the final output of a workflow. It is essential to have at least one end node to conclude the process and generate the final output.
Acting as the termination point, the end node does not allow further node additions beyond it. Workflow applications produce results only when the process reaches the end node. If conditional paths are present, multiple end nodes must be established.
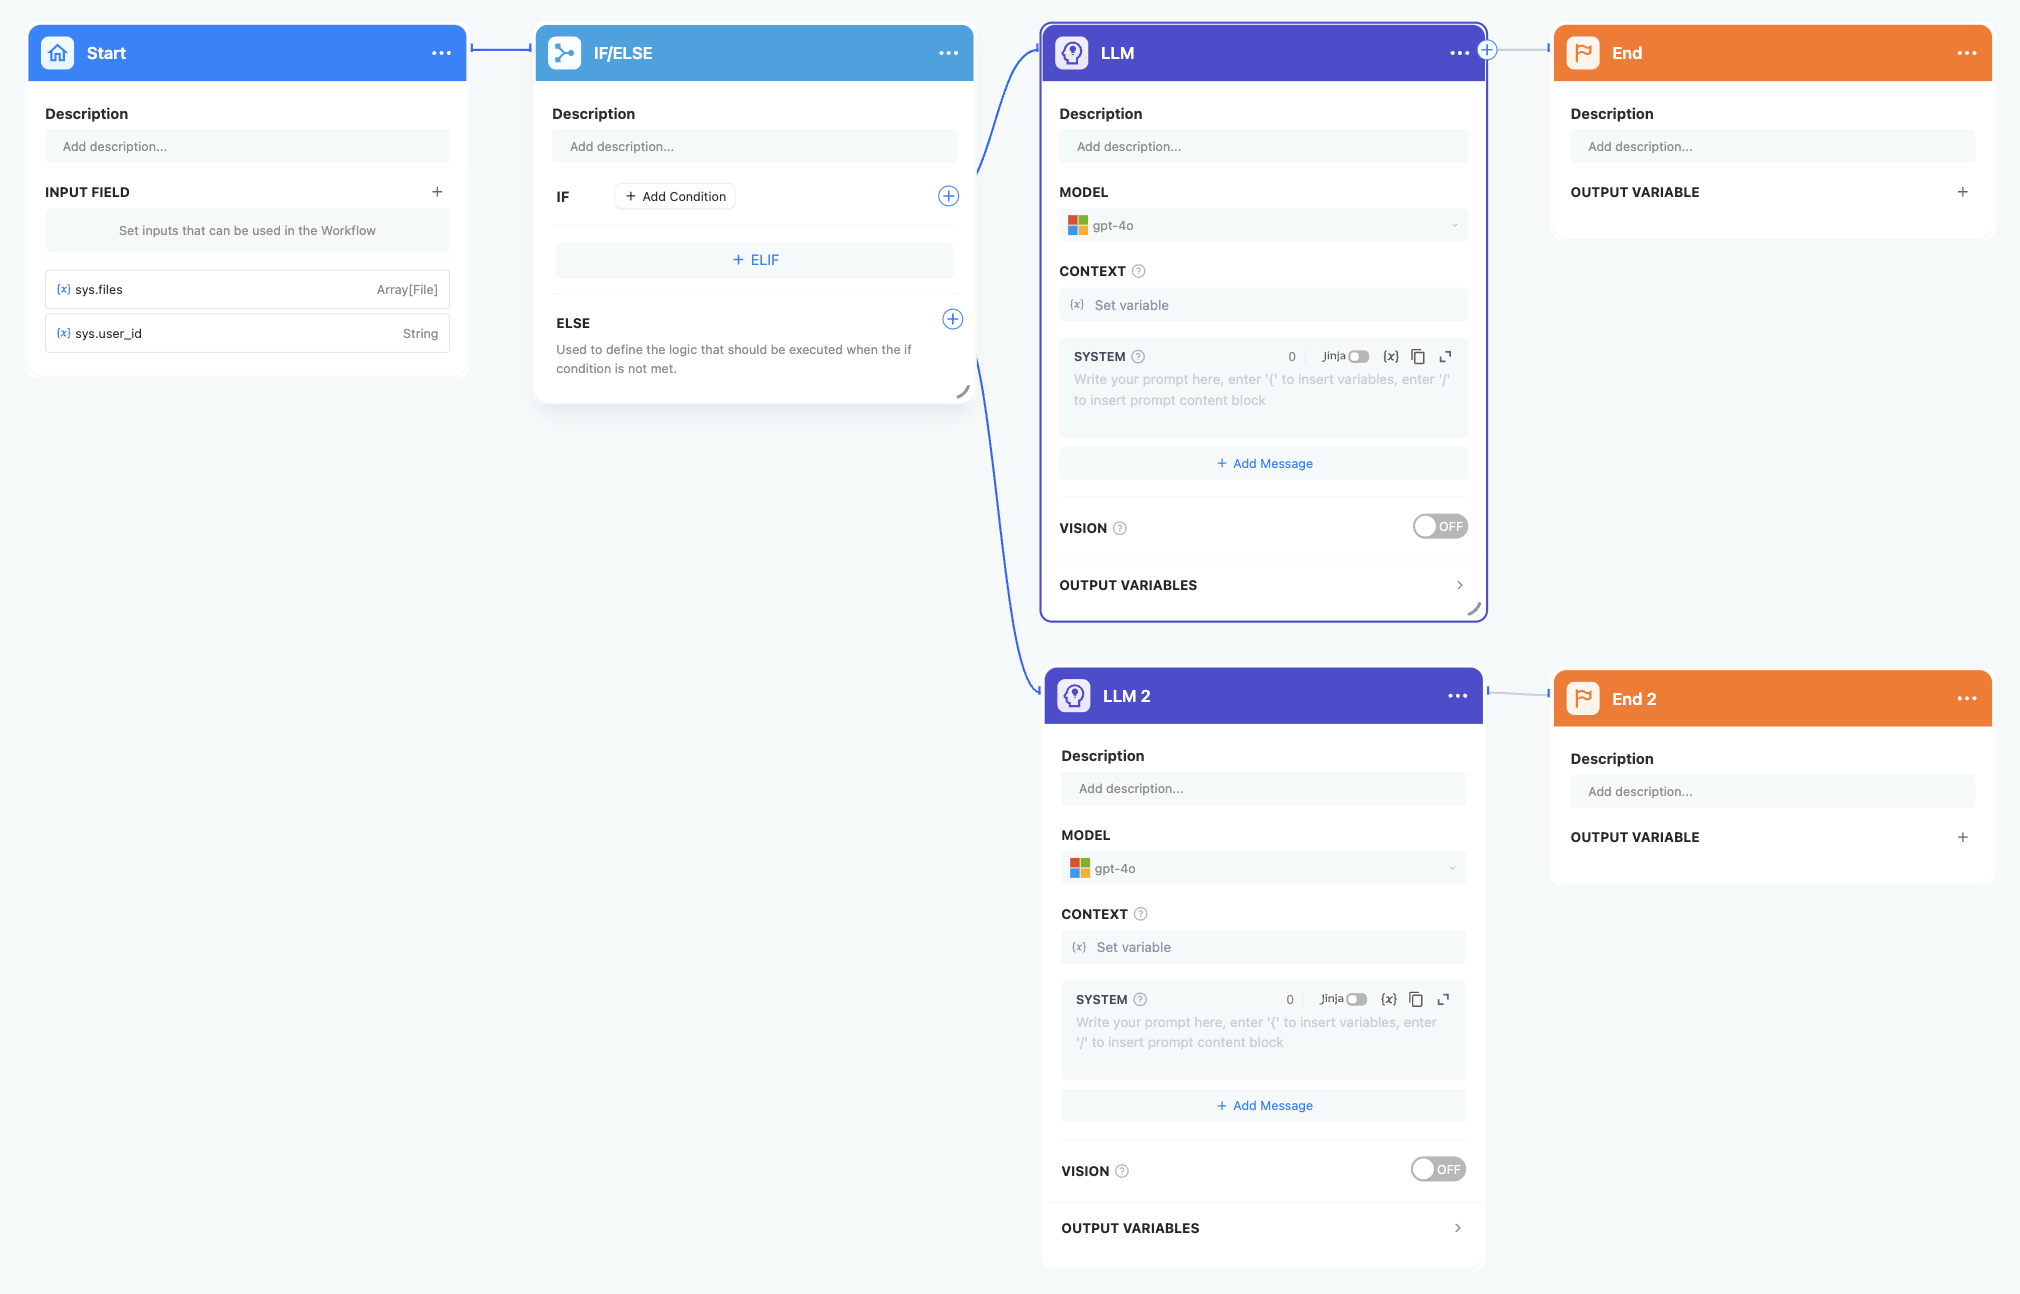
The end node must specify one or more output variables, which can refer to output variables from any preceding upstream node.
LLM Node
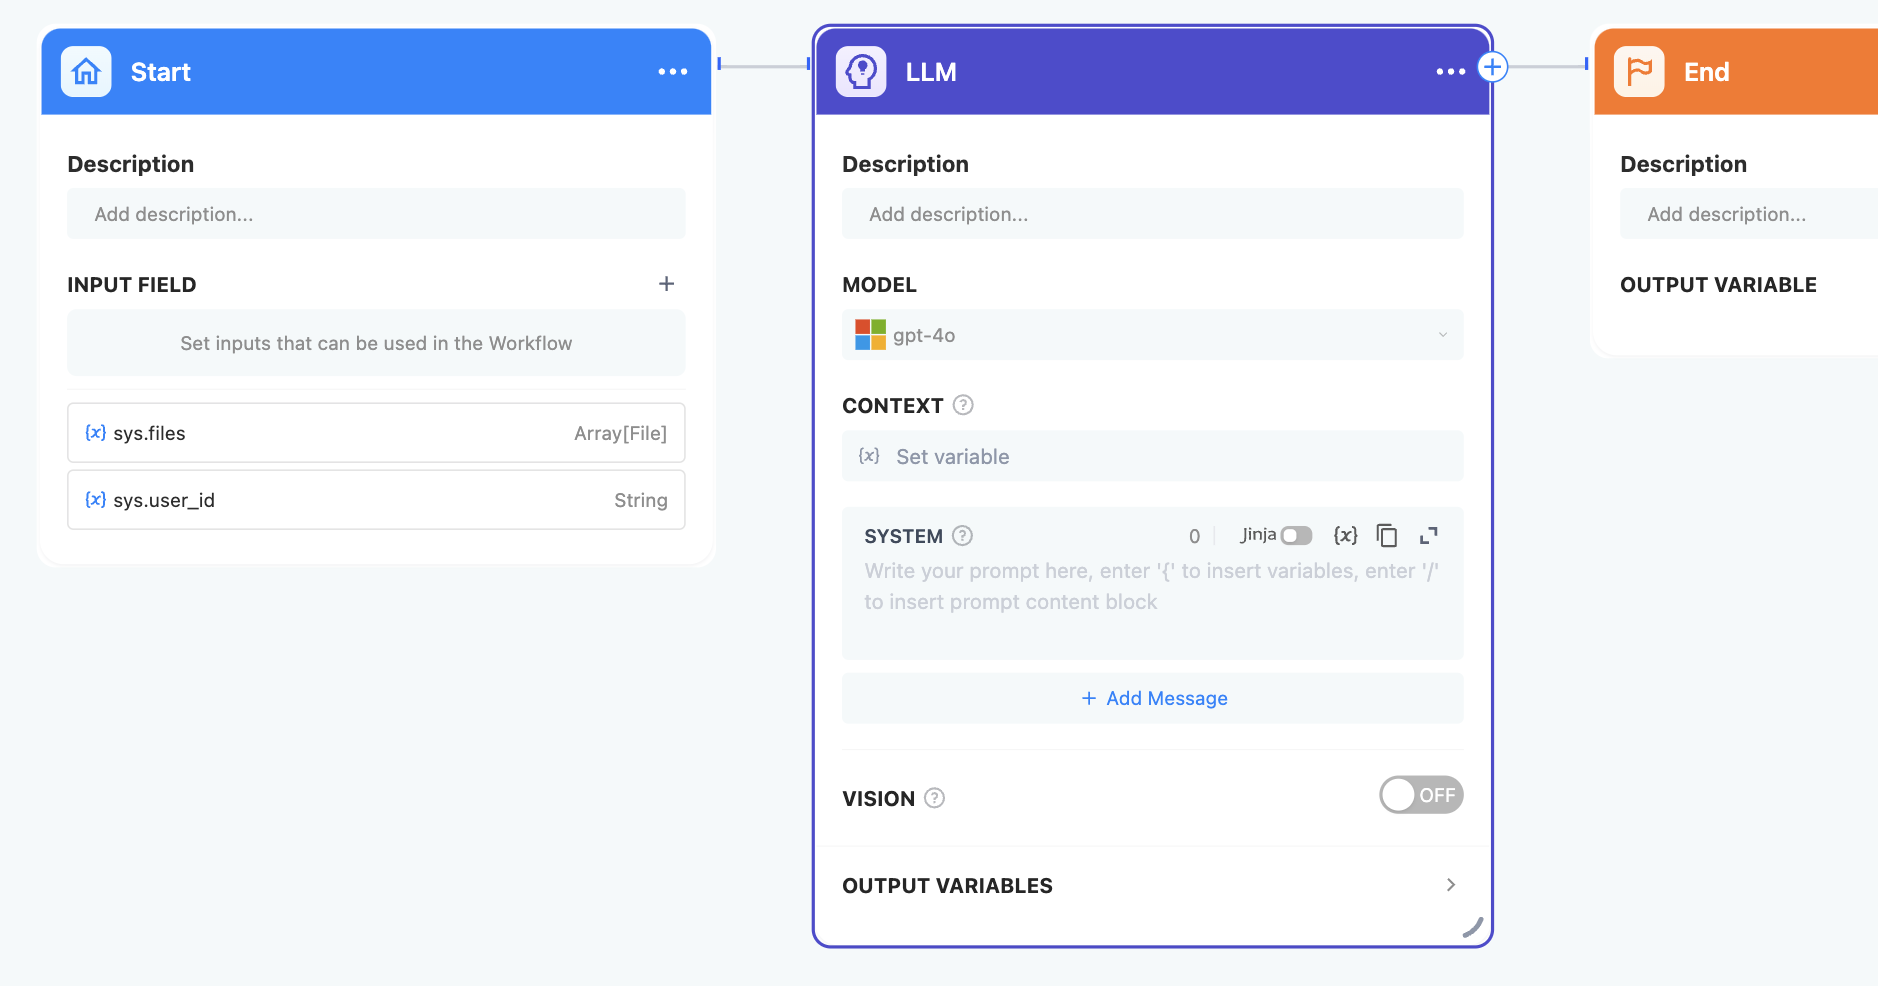
This node engages large language models to interpret questions or process natural language inputs.
Scenarios
-
Intent Recognition: Utilized in customer service to discern and categorize user queries, guiding subsequent steps in the process.
-
Text Generation: Employed in content creation to craft text aligned with themes and keywords.
-
Content Classification: In email management, it automatically sorts emails into categories like inquiries, complaints, or spam.
-
Text Conversion: Facilitates translation by converting user-submitted text into a chosen language.
-
Code Generation: Assists in programming tasks by creating specific business code or test cases based on user specifications.
-
RAG: In knowledge base Q&A, reorganizes relevant retrieved information to address user queries effectively.
-
Image Understanding: Uses multimodal models with vision capabilities to comprehend and respond to questions regarding image content.
By selecting the right model and composing effective prompts, you can craft robust solutions within the Workflow.
Configuration Steps
-
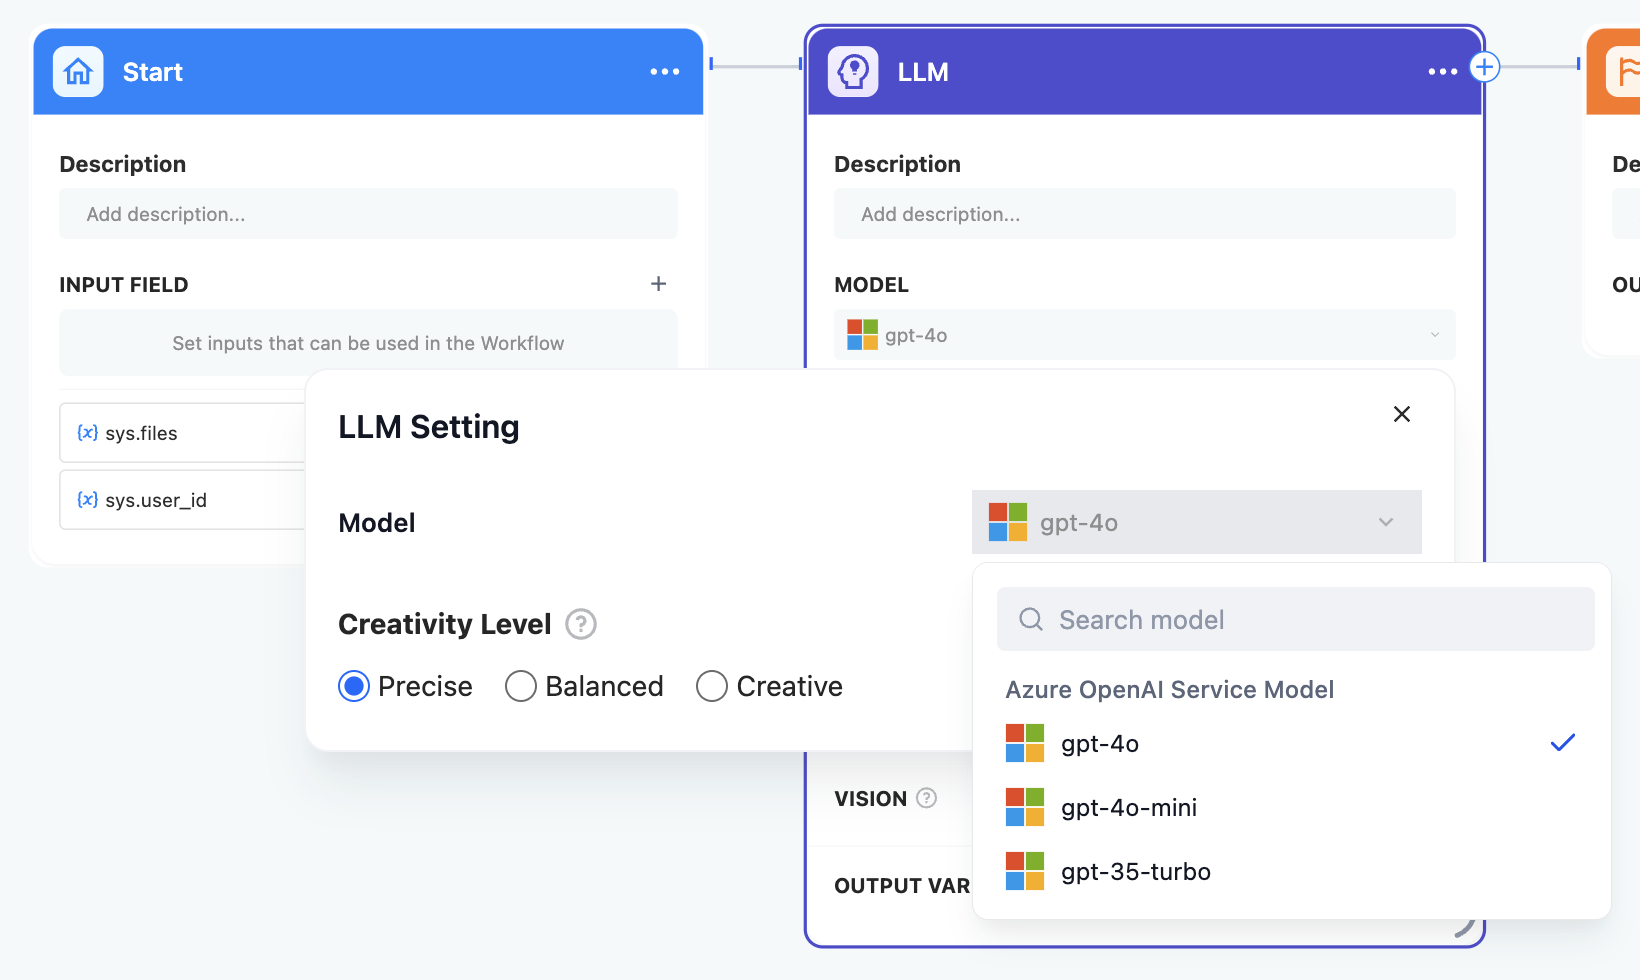
Select a Model: Choose a model that aligns with your task type and scenario requirements.
-
Select Creativity Level: Select "Precise" for more factual and direct answers, "Creative" for imaginative and unconventional responses, or "Balanced" for a mix of both styles.

-
Write Prompts: Utilize the user-friendly prompt composition page for the LLM node.
Knowledge Retrieval Node
The Knowledge Base Retrieval Node plays a crucial role in querying relevant text content from the DigiAI Knowledge Base. This retrieved information serves as valuable context, enhancing the subsequent responses generated by the Large Language Model (LLM).
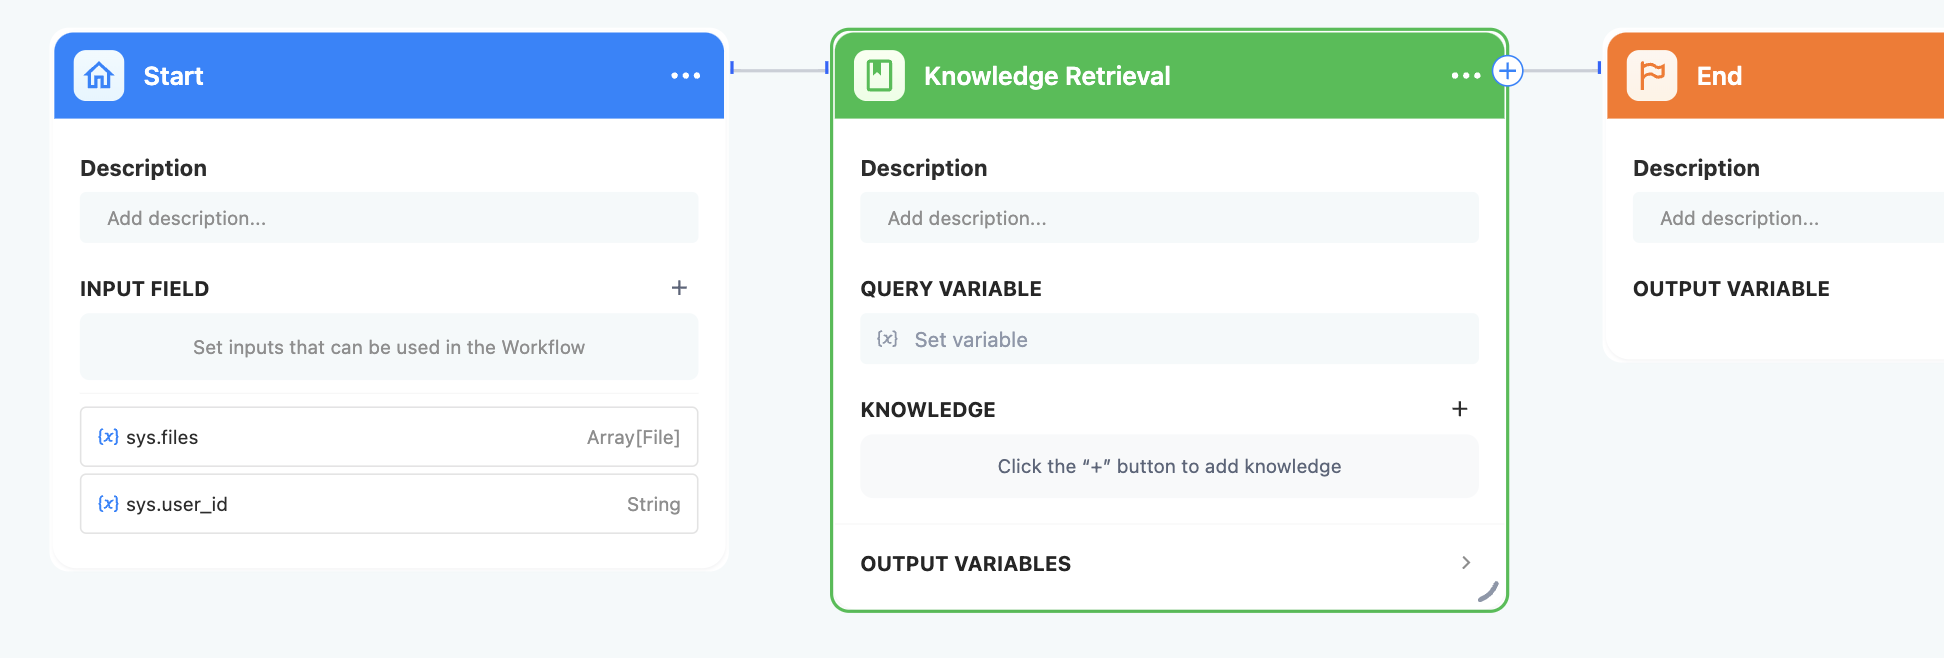
Configuration Steps
-
Select the Query Variable: Start by determining the query variable, which typically represents the user's inquiry or question. This variable guides the retrieval process by identifying the specific content needed from the knowledge base.
-
Choose the Appropriate Knowledge Base: Within the retrieval node settings, you have the opportunity to add and select an existing knowledge base from DigiAI AgentHub. This selection ensures that the most relevant information database is used to address the user's query effectively.
Question Classifier Node
The Question Classifier Node enables the intelligent categorization of user inputs by aligning them with predefined classification descriptions. This node's output facilitates efficient content routing to appropriate downstream processes.
Scenarios
Utilized in a variety of cases such as categorizing customer inquiries, organizing feedback and reviews.
For example, in a technical support workflow, the Question Classifier Node can act as an initial processing stage before engaging specific systems or resources. It efficiently categorizes questions, directing them to the appropriate destination for precise responses.
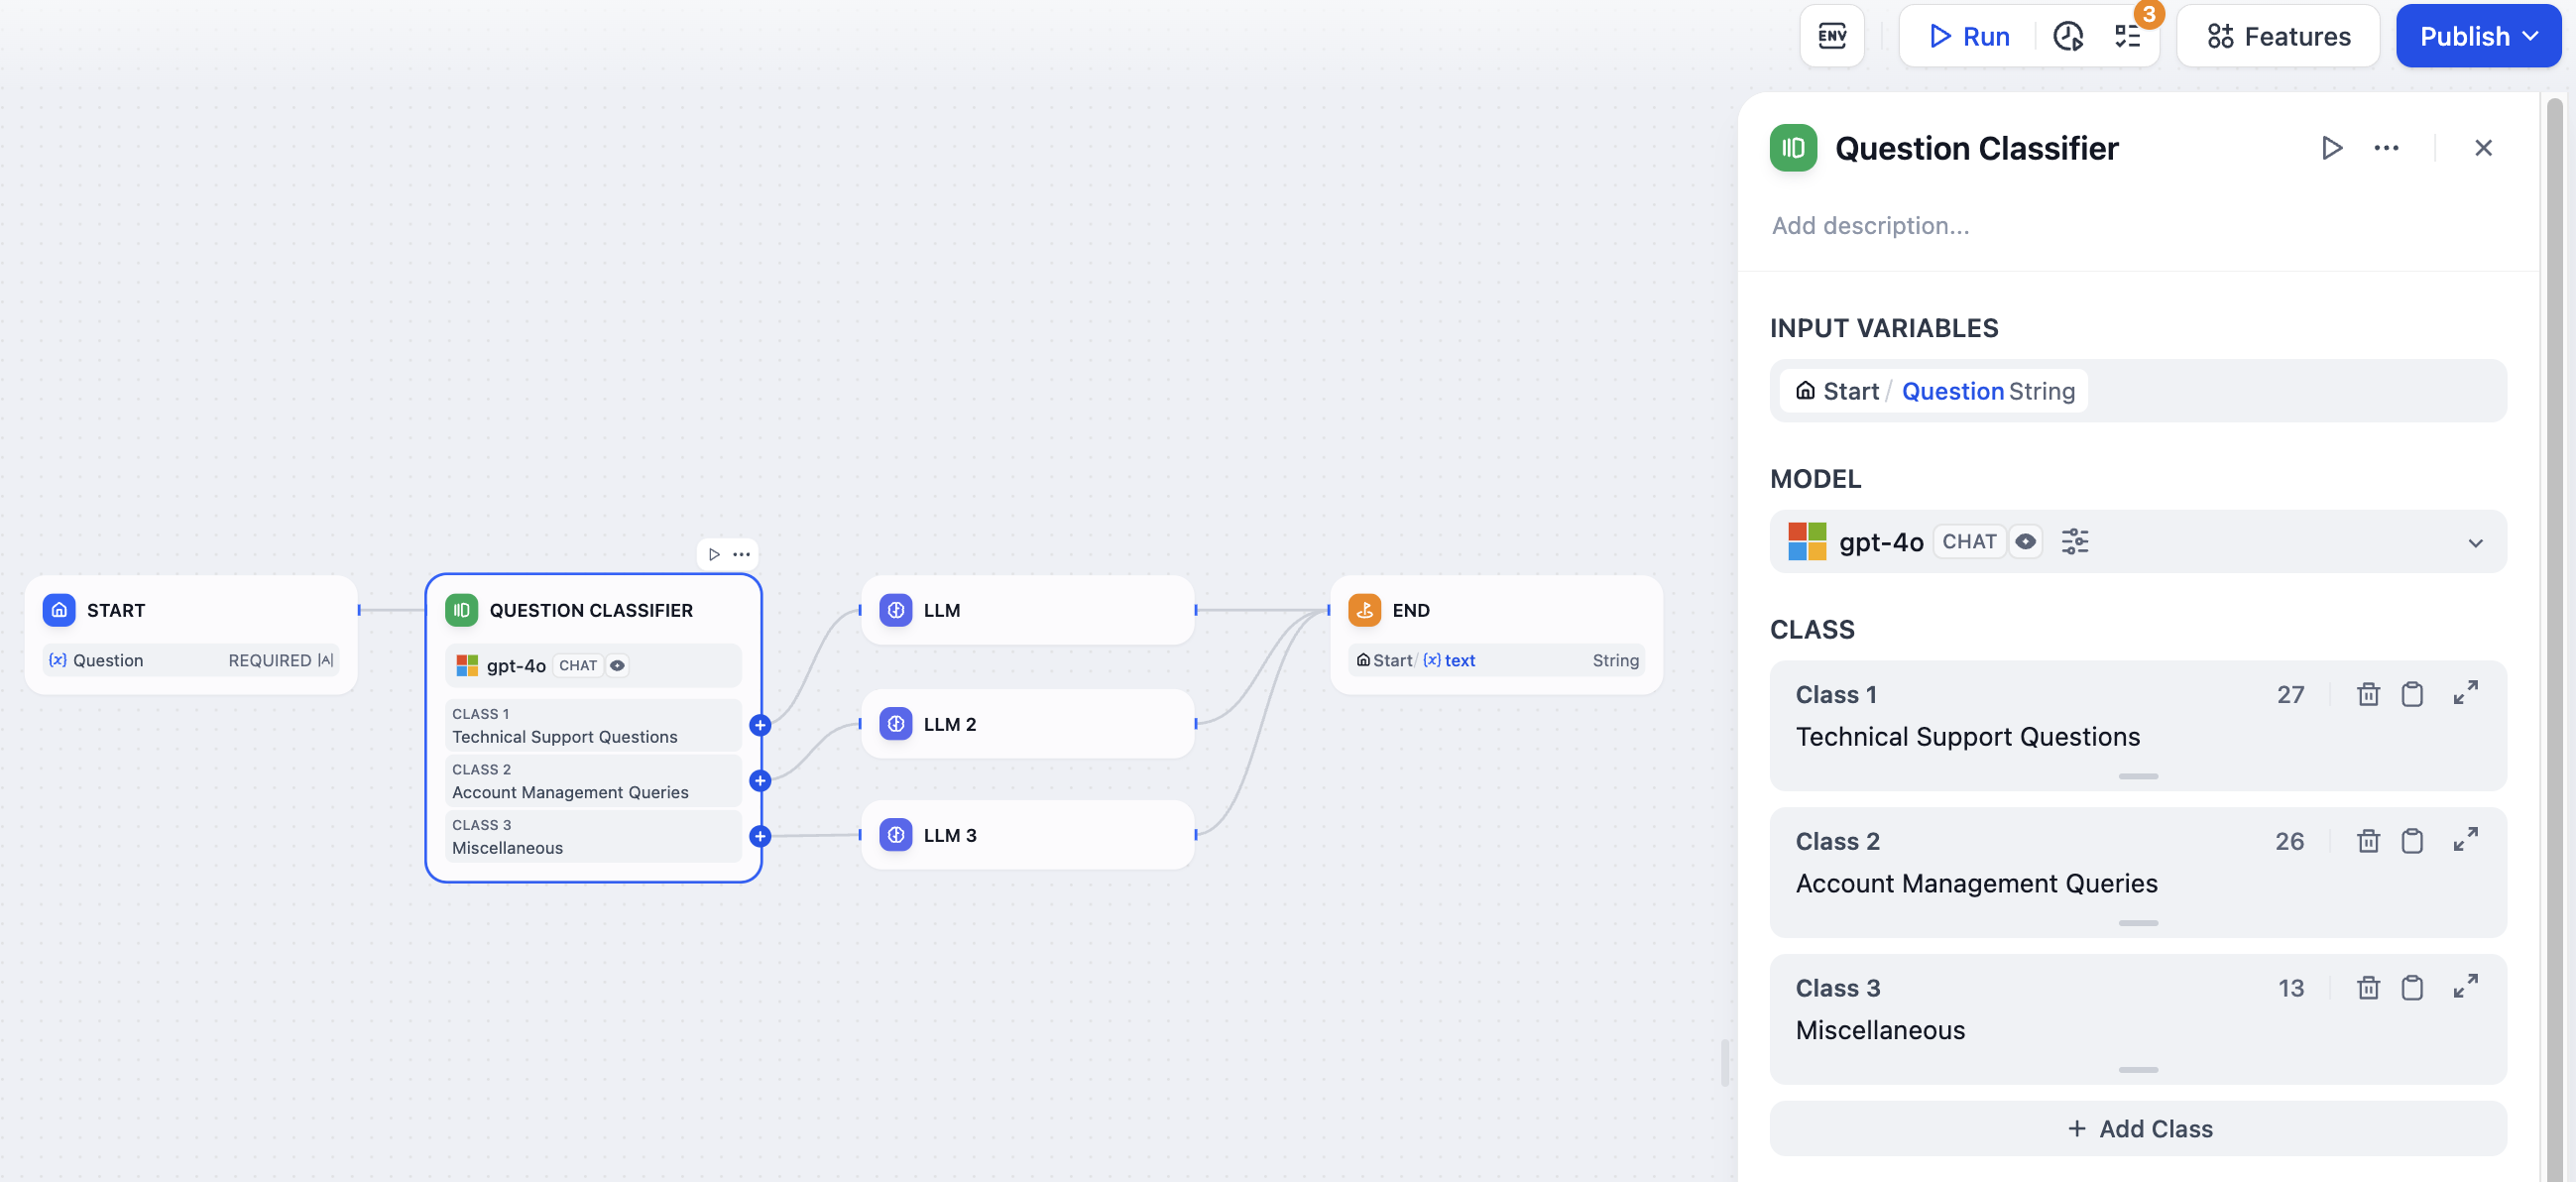
In this context, we define three classification categories:
-
Category 1: Technical Support Questions
-
Category 2: Account Management Queries
-
Category 3: Miscellaneous
Sample Inputs and Their Categories:
-
"How do I reset my router?" → "Technical Support Questions"
-
"How can I update my billing information?" → "Account Management Queries"
-
"What's the office dress code?" → "Miscellaneous"
Configuration Steps
-
Select Input Variable: Identify the input content, such as user inquiries under a technical support system.
-
Choose Inference Model: Employ large language models for their natural language processing strengths. An optimal model choice will enhance the effectiveness of classification.
-
Write Classification Labels/Descriptions: Craft multiple classification criteria by inputting keywords or descriptive phrases for each category. These augment the model's understanding of classification rules.
-
Advanced Settings: Incorporate additional details or guidelines to refine the node's performance, enhancing its classification precision.
-
Select Corresponding Downstream Nodes: Post-classification, direct the workflow through different pathways reflecting the categorized output, ensuring alignment with respective downstream nodes.
IF/ELSE Node
The Conditional Branch IF/ELSE Node is a tool for directing workflow operations along multiple pathways depending on logical conditions. This node enables the workflow to dynamically adapt based on varying scenarios, ensuring precise execution paths.
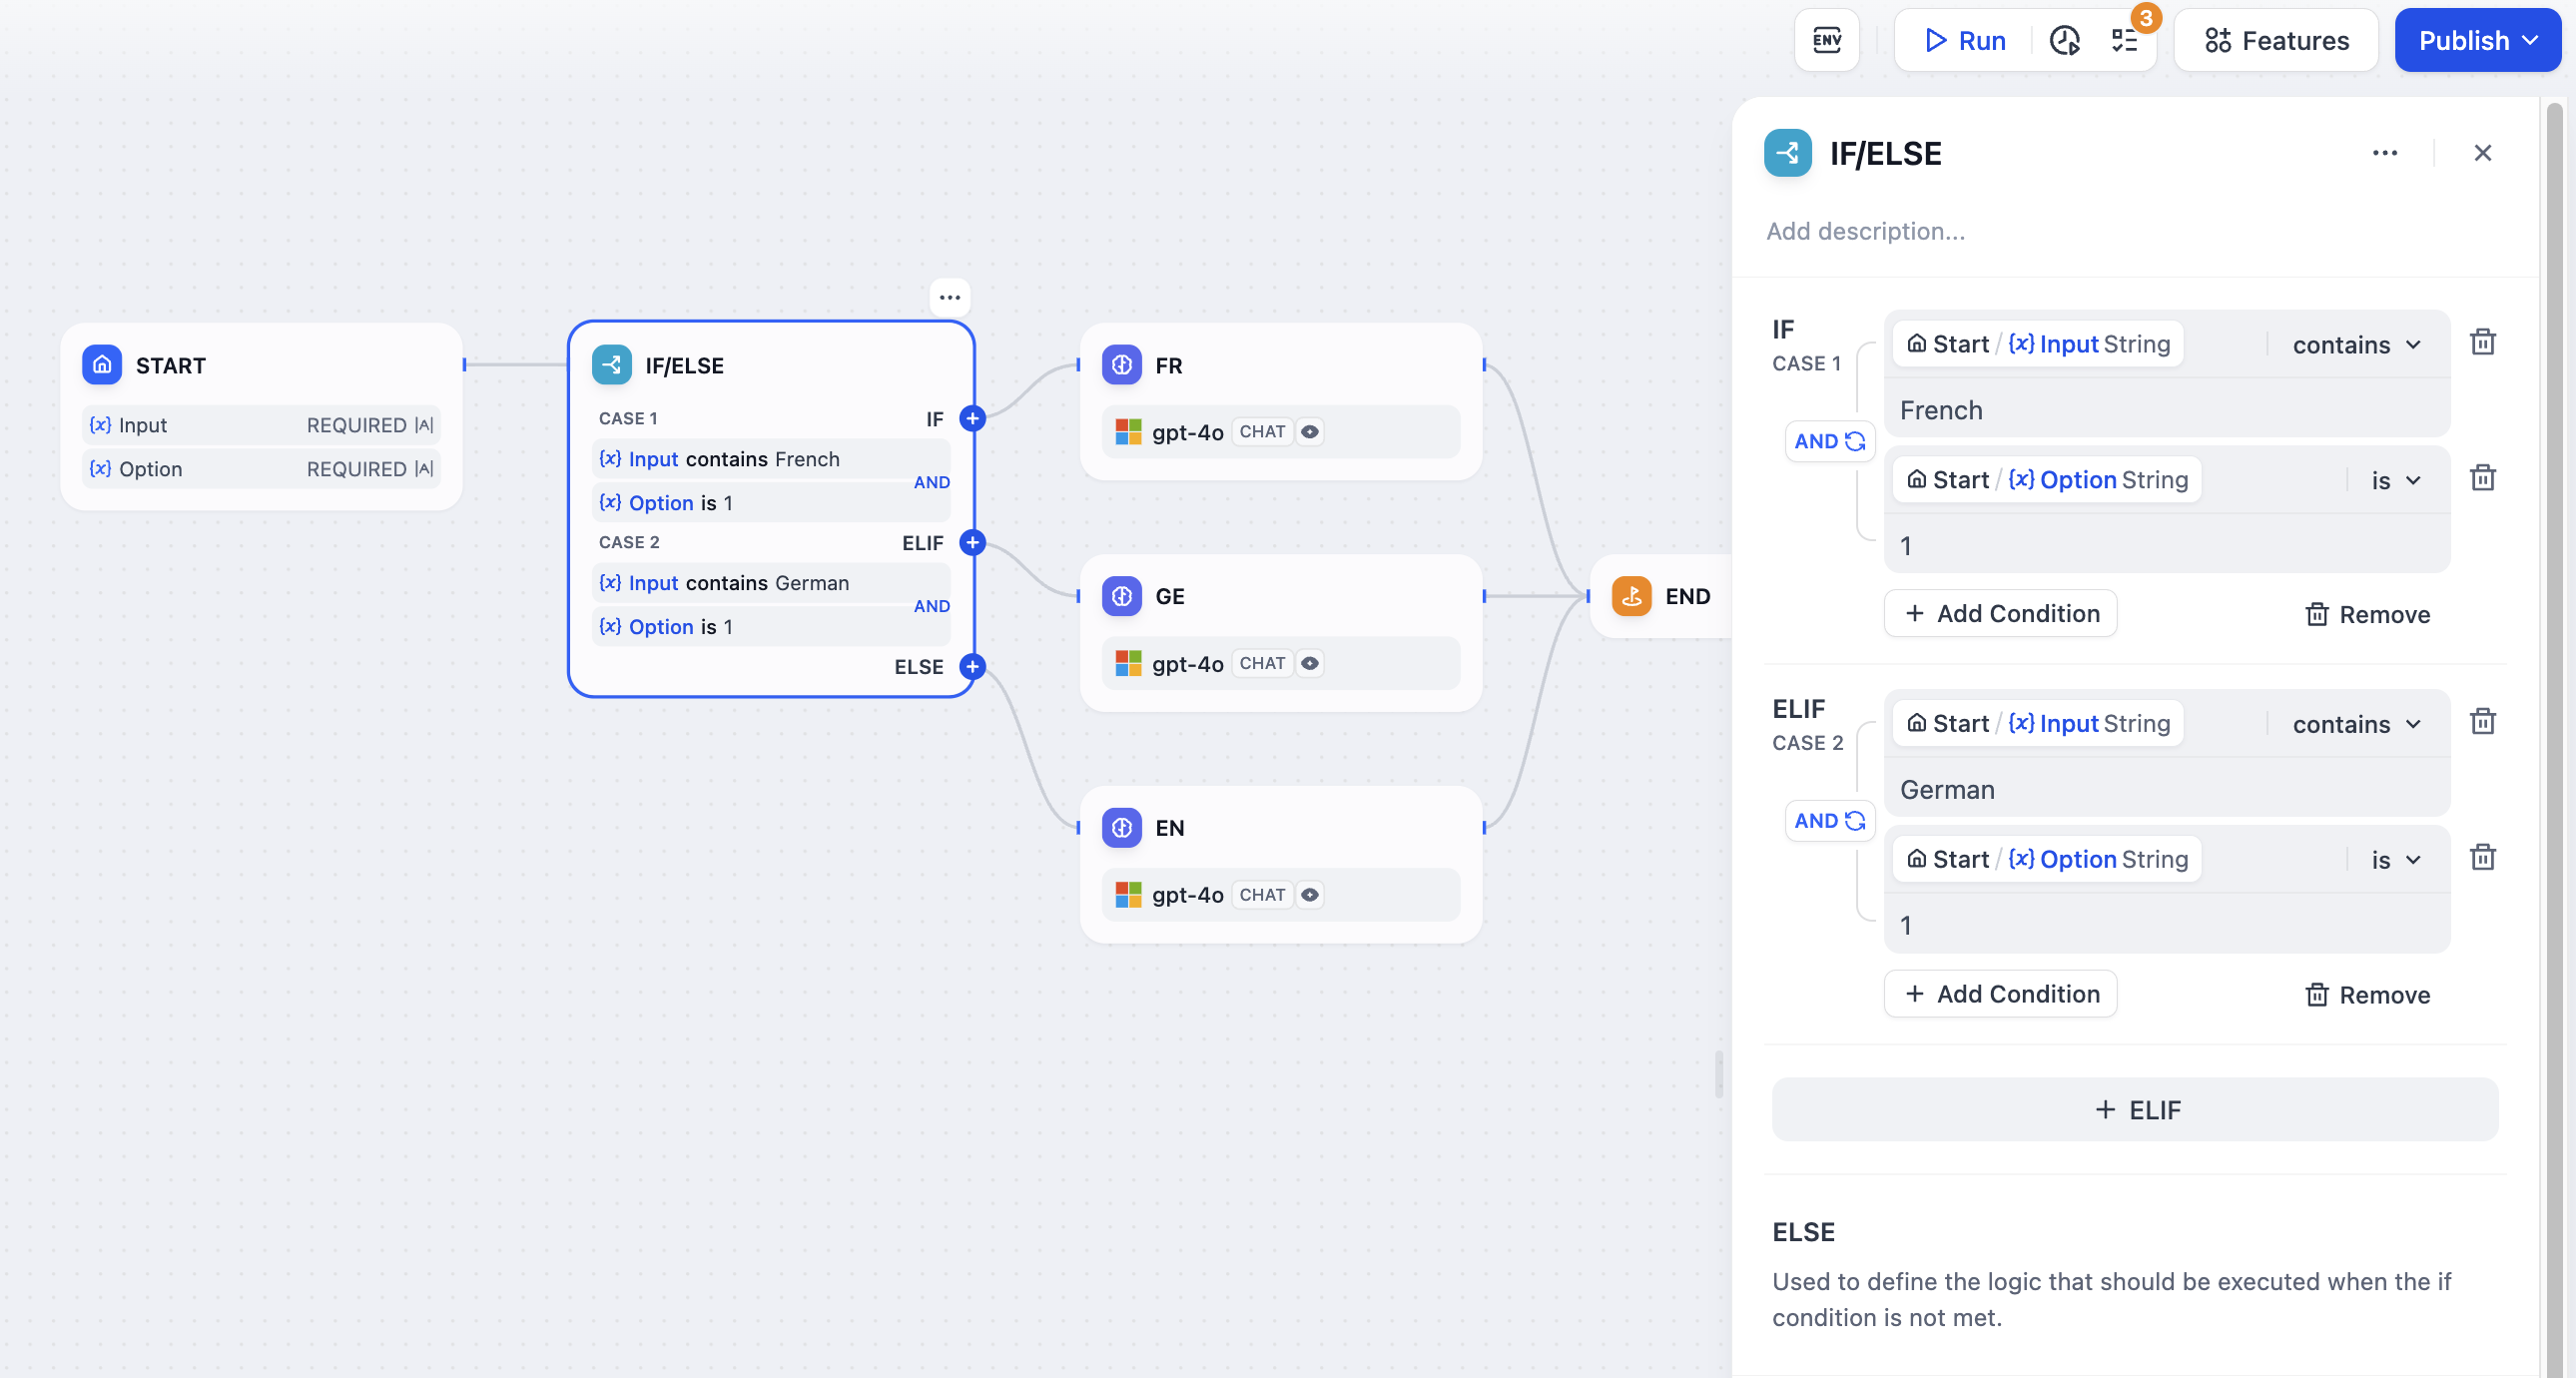
This node comprises three components:
-
IF Condition: Start by selecting a variable, followed by defining a condition and assigning the specific value that will satisfy this condition. When the IF condition is met (True), the workflow proceeds along the IF path.
-
ELSE Path: If the IF condition is not met (False), the workflow diverges into the ELSE path, allowing for an alternative set of operations.
-
ELIF Conditions: For scenarios requiring additional granularity, you can introduce ELIF conditions. If the first ELIF condition is satisfied (True), that path is executed. If not (False), the workflow evaluates subsequent ELIF conditions or defaults to the final ELSE path.
For intricate decision-making, the node allows establishing multiple conditional checks, where you can integrate logical operators like AND or OR between conditions. This enables constructing comprehensive intersections (AND) or unions (OR) to achieve the desired conditional logic.